Table of Contents
Download
Pre-built binaries
You can download a prebuilt binary version of iPXE as an ISO image from https://boot.ipxe.org/ipxe.iso. This image allows you to experiment with iPXE for the first time. To use iPXE fully, you will need to build an appropriate image from source.
Source code
The iPXE source code is maintained in a git repository at https://github.com/ipxe/ipxe. You can check out a copy of the code using:
git clone https://github.com/ipxe/ipxe.git
and build it using:
  cd ipxe/src
  make
You will need to have at least the following packages installed in order to build iPXE:
- gcc
- binutils
- make
- perl
- liblzma or xz header files
- mtools
- mkisofs or genisoimage or xorrisofs (needed only for building .iso images)
- syslinux (for isolinux, needed only for building .iso images)
Choosing what to build
Using a boot CD-ROM or USB key
You can put iPXE on a bootable CD-ROM or USB key, and use this to boot (almost) any machine using iPXE. This can be useful if you only occasionally need to boot machines using iPXE, or if you are dealing with computers that you don't personally control.
You can build an iPXE bootable CD-ROM image using:
make bin/ipxe.iso
and then burn bin/ipxe.iso onto a blank CD-ROM or DVD-ROM.
You can build an iPXE bootable USB key image using:
make bin/ipxe.usb
and then transfer this image onto a blank USB key using
dd if=bin/ipxe.usb of=/dev/sdX
where /dev/sdX is the device representing your USB key. Please note that this will erase any existing contents of the USB key.
Chainloading from an existing PXE ROM
You can chainload iPXE from an existing PXE ROM. This is useful if you have a large number of machines that you want to be able to boot using iPXE, but you do not want to reflash the network card on each individual machine.
You can build a chainloadable iPXE image using:
make bin/undionly.kpxe
You can now configure your network for chainloading.
Replacing an existing PXE ROM
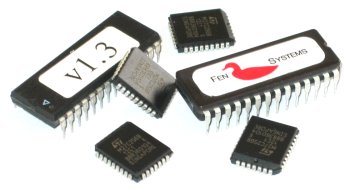
You can replace the PXE ROM on your network card (or motherboard) with iPXE. This is useful if you want the machine to always be able to boot using iPXE, without depending on a CD-ROM or a chainloader.
You will need to build a ROM image for your specific network card using something like:
make bin/808610de.rom
where 808610de is constructed from the network card's PCI vendor and device IDs. Full instructions are in the ROM burning tutorial.
Advanced topics
Embedded scripts
You can override the default behaviour of iPXE by using an embedded script. For example, you may wish to build a version of iPXE that uses DHCP to obtain an IP address but then boots from a predefined SAN target.
Named configurations
It is possible to build binaries with different configurations from the same codebase using named configurations. This makes it easy to have one configuration for a ROM, another one for a chainloaded binary and a third configuration for a UEFI binary.
Debug builds
iPXE has extensive built-in debugging facilities that can be selectively enabled by specifying a list of DEBUG objects at build time. For example, to debug problems involving iSCSI, it may be useful to enable debugging of the iSCSI protocol driver (in iscsi.c):
make bin/ipxe.iso DEBUG=iscsi
If you discover that the problem is not within iscsi.c then you may wish to also enable debugging of the SCSI layer (in scsi.c):
make bin/ipxe.iso DEBUG=scsi,iscsi
Many objects provide multiple levels of debugging. For example, to enable a debug message for every SCSI command, you could use:
make bin/ipxe.iso DEBUG=scsi:3,iscsi
The numeric debug level (3 in this example) is a bitmask:
| Value | Meaning |
|---|---|
| 1 | Enable basic debug messages |
| 2 | Enable verbose debug messages (e.g. one message per event) |
| 4 | Enable extra-verbose debug messages (e.g. one message per byte) |
| 8 | Enable I/O tracing (e.g. one message per readl()/writel() call) |
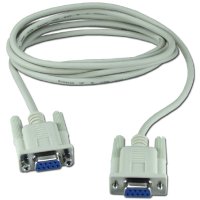
You may wish to enable the serial console (CONSOLE_SERIAL in config/console.h) and connect up a null-modem cable to capture the output. You can configure the serial port settings in config/serial.h if you need to change the default of 115200,8N1. If no serial port is available, a digital camera aimed at the screen can often make a surprisingly good substitute!
Large ROM images
If you enable large numbers of iPXE features, you may find that the ROM becomes too large to use. Some network cards cannot support ROMs larger than 64kB, and some BIOSes may fail to complete their power-on self-test (POST) when larger ROM images are present.
You may be able to use a .mrom image to alleviate some of these problems. A .mrom image appears to the BIOS as a very small (3kB) ROM, which contains only a small loader stub. The full iPXE image is loaded only when the BIOS attempts to boot from the network card.
You can build a .mrom image by simply changing .rom to .mrom. For example:
  make bin/808610de.rom    # Normal .rom image
  make bin/808610de.mrom   # .mrom image
You can burn a .mrom image in exactly the same way as a normal .rom image.
Not all network cards will support a .mrom image. To support a .mrom image, a network card must have at least one PCI memory BAR that is at least as large as its expansion ROM BAR. For example, if the network card has a 128kB expansion ROM BAR and a 256kB memory BAR, then it will be able to support a .mrom image up to 128kB in size.
UEFI
iPXE supports both UEFI and BIOS platforms. You can build a UEFI ROM using the .efirom image format. For example:
make bin-x86_64-efi/808610de.efirom
where 808610de is constructed from the network card's PCI vendor and device IDs.
You can also build a .efi executable which you can chainload from an existing UEFI ROM (or run directly from the UEFI shell):
make bin-x86_64-efi/ipxe.efi


