Table of Contents
Installing to an iSCSI target using WDS
Windows Deployment Services (WDS) is the component of Windows Server that allows you to install Windows over the network. If you are using iPXE, then you can use Windows Deployment Services to install Windows Server 2008, Windows Server 2012, Windows 7, Windows 8, or Windows 10 directly to an iSCSI target on your network.
Prerequisites
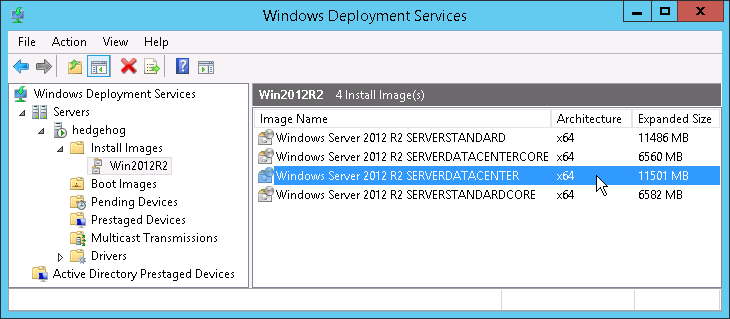
You must already have a working Windows Deployment Services installation, complete with a Boot Image and at least one Install Image:
Instructions
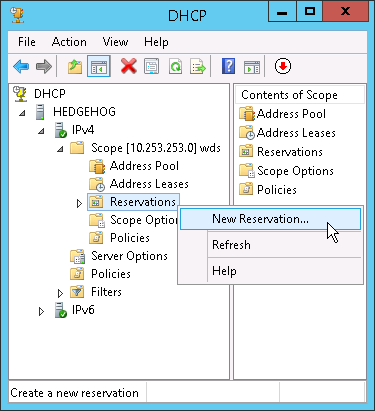
Create a DHCP reservation for each diskless computer that you want to install directly to an iSCSI target. Go to Start → Administrative Tools → DHCP and open up your DHCP scope. Right-click on Reservations and choose New Reservation:
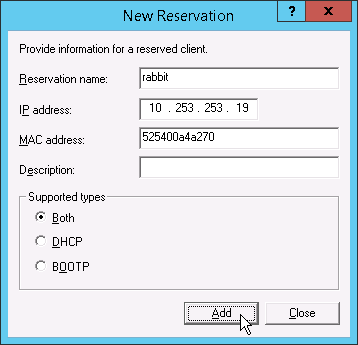
Fill in the basic details for this reservation:
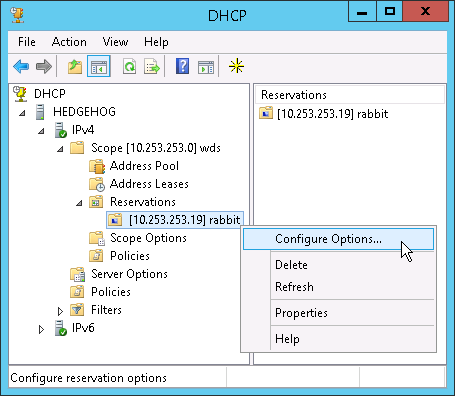
Click on Add to create the reservation, and then Close to close the dialog box. Right-click on the new reservation and choose Configure Options:
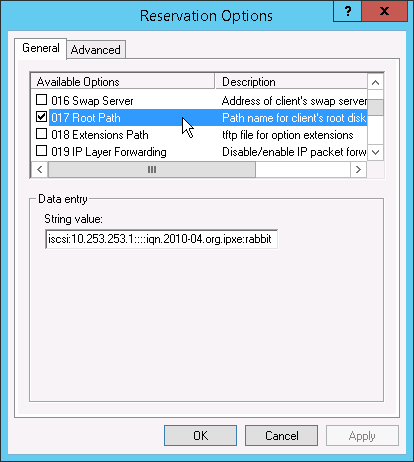
Scroll down to option 017 Root Path and enter the iSCSI root path for the installation. For example, to boot from the iSCSI target at 10.253.253.1 using the IQN iqn.2010-04.org.ipxe:rabbit, you would set option 017 Root Path to
iscsi:10.253.253.1::::iqn.2010-04.org.ipxe:rabbit
Boot the diskless computer using iPXE. (If the diskless computer does not have an iPXE boot ROM, then you will need to set up PXE chainloading.)
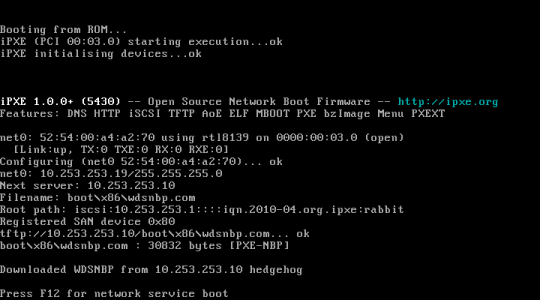
You should see the diskless computer connect to the iSCSI target and then prompt you to “Press F12 for network service boot”:
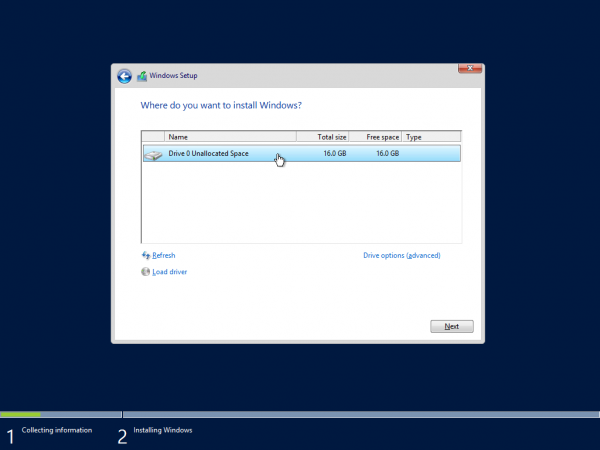
Press F12 to boot from the network, and proceed to install Windows as usual. When you reach the “Where do you want to install Windows?” screen, you should see the iSCSI disk appear as a possible install location:
Congratulations on successfully using WDS to install Windows to an iSCSI target!
Troubleshooting
You may need to specify an iSCSI initiator IQN to gain access to the iSCSI target.
If the iSCSI disk does not appear as a possible install location, then you can use the Windows command prompt to diagnose the problem. Press Shift-F10 to access the command prompt.
- Type
ipconfigand check that you have successfully obtained an IP address from your DHCP server.
- Type
route printand check carefully that the routing table appears to be sensible. Note that Windows will always create a static route to the iSCSI target via the default gateway, even if the iSCSI target is on the same subnet. Many routers will not forward packets back to the originating subnet, causing communication with the iSCSI target to fail once Windows takes over. You can work around this problem:- If the default gateway is not required for booting (i.e. if you are booting entirely from the local subnet), then you can use the iPXE command
set netX/gateway 0.0.0.0
to delete the default gateway before booting from the iSCSI target.
- You can install the
sanbootconfdriver in Windows, which will automatically remove the redundant route.
- Check that you can ping the iSCSI target.
- Examine the Setup log using
notepad x:\windows\panther\setupact.log
Check for the
DiskInfolines, which should contain information such as
    DiskInfo:===== Disk number [0] =====
    DiskInfo:  Friendly name: [LIO-ORG rabbit SCSI Disk Device]
    DiskInfo:  Arc path: [multi(0)disk(0)rdisk(0)]
    DiskInfo:  Disk signature [0x9A7083D5]
    DiskInfo:  Size (bytes) [17179869184 / 0x400000000]
    DiskInfo:  Disk bus type: [iSCSI]
    ...
Also check for the line
Callback_BootstrapApplyWpeSettings: Detected iBFT; setup will initialize networking support for iSCSI
If you are unable to resolve your problem, then you can contact the iPXE developers and other iPXE users.
