Table of Contents
iPXE in Amazon EC2
You can use iPXE to boot Amazon (AWS) EC2 instances using a public iPXE AMI. You can use an iPXE script to direct the EC2 instance to boot via any means supported by iPXE. For example, you could boot a set of diskless EC2 instances using HTTPS or iSCSI from a single server hosted in the same AWS region.
Launching
The EC2 iPXE images are published outside of the AWS Marketplace and are shared directly from account 833372943033.
Launch the latest iPXE AMI for your AWS region and CPU architecture from the table below:
You can use any compatible EC2 instance type (including instance types with Enhanced or SR-IOV networking).
Configuring
iPXE EC2 instances are controlled via an iPXE script stored as the instance user-data. The iPXE AMI includes an embedded script that will automatically obtain an IP address via DHCP, print out some useful diagnostic information, and then download and execute http://169.254.169.254/latest/user-data.
You can use this user-data iPXE script to direct the remainder of the network boot process. For example, to download and boot Tiny Core Linux, you could set your instance's user data to contain:
  #!ipxe
  set base http://tinycorelinux.net/12.x/x86/release/distribution_files/
  kernel ${base}/vmlinuz64 initrd=rootfs.gz initrd=modules64.gz
  initrd ${base}/rootfs.gz
  initrd ${base}/modules64.gz
  boot
Congratulations on successfully booting an EC2 instance using iPXE!
iSCSI
You can use your user-data script to direct iPXE to boot from an iSCSI target. For example: to boot from an iSCSI target hosted on another EC2 instance 172.16.0.1 within the same VPC, you could set your instance's user data to contain:
  #!ipxe
  sanboot iscsi:172.16.0.1::::iqn.1995-08.org.example.iscsitarget:disk1
Note that the operating system on the iSCSI target disk will need to include the appropriate software and configuration to allow it to identify its own iSCSI root disk. You can install software such as sanbootable to help set up the required configuration.
IPv6
The iPXE AMI will include support for both IPv4 and IPv6. You should enable IPv6 in your VPC to speed up the boot, since otherwise iPXE will spend several seconds attempting to obtain an IPv6 address.
Troubleshooting
You can view the iPXE output via the EC2 system log or instance screenshot. For example:
  aws ec2 get-console-output --query Output --output text \
          --instance-id i-04549ed5e420eae6e
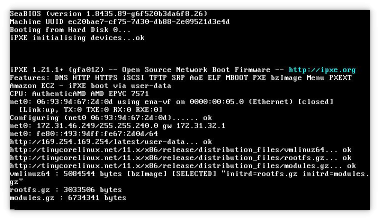
You should see output similar to:
  iPXE 1.21.1+ (gfa012) -- Open Source Network Boot Firmware -- http://ipxe.org
  Features: DNS HTTP HTTPS iSCSI TFTP SRP AoE ELF MBOOT PXE bzImage Menu PXEXT
  Amazon EC2 - iPXE boot via user-data
  CPU: GenuineIntel Intel(R) Xeon(R) CPU E5-2676 v3 @ 2.40GHz
  net0: 06:ee:8d:98:cc:67 using netfront on vif/0 (Ethernet) [closed]
    [Link:up TX:0 TXE:0 RX:0 RXE:0]
  Configuring (net0 06:ee:8d:98:cc:67)...... ok
  net0: 172.31.41.104/255.255.240.0 gw 172.31.32.1
  net0: fe80::4ee:8dff:fe98:cc67/64
  http://169.254.169.254/latest/user-data... ok
Note that there is often a time delay of several minutes in obtaining system logs or instance screenshots from EC2 - this is a longstanding problem with EC2 itself and is not related to iPXE. You may need to retry the command several times (or possibly stop the instance) in order to obtain any output.
Building from source
You can build your own version of the public iPXE AMIs using:
  make CONFIG=cloud EMBED=config/cloud/aws.ipxe \
       bin-x86_64-pcbios/ipxe.usb bin-arm64-efi/ipxe.usb
and import them using the aws-import tool (found in the contrib directory in the iPXE source tree).


